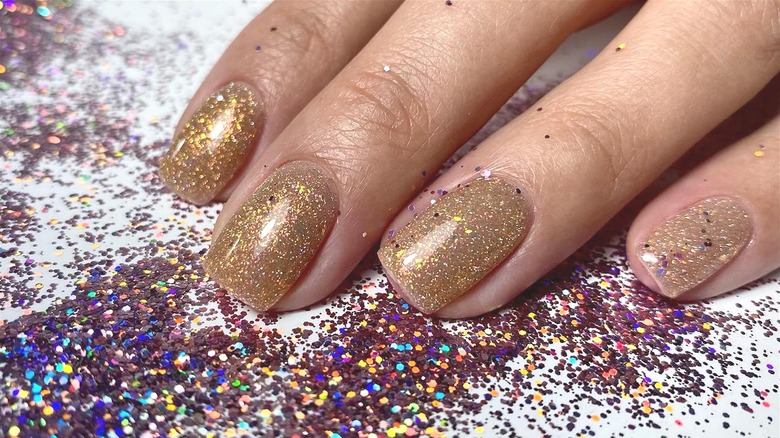
Let’s be honest: is there anything more instantly uplifting than a sparkly manicure? Whether you’re heading to a party, a wedding, or just want to add a little joy to your Tuesday, glitter nails are the perfect accessory. They’re the confetti of the beauty world, and they’re here to stay.
But why are we so drawn to these tiny, shining specks? And how can you achieve the perfect glitter manicure at home? Let’s dive in.
Why We Love Glitter Nails?
The appeal of glitter nails is simple yet powerful.
1. Instant Glamour: A swipe of glitter can transform any manicure from simple to stunning in seconds. It catches the light and draws the eye, making your hands look well-groomed and festive with minimal effort.
2. A Mood Booster: There’s a reason it’s called “happy glitter.” The sparkle is inherently cheerful and fun. It’s a small act of self-expression that can genuinely brighten your day.
3. Hides a Multitude of Sins: Chips, slight smudges, or grown-out nails are much less noticeable when hidden under a layer of sparkle. It’s the perfect way to extend the life of your manicure for a day or two longer.
4. Endless Versatility: Glitter isn’t just one look. It can be subtle or bold, full-coverage or just an accent. You can choose from a rainbow of colors and different sizes of glitter, from fine dust to chunky hexagons.
How to Get the Perfect Glitter Manicure?
Ready to add some sparkle to your life? Here are two popular and achievable glitter nail designs.
What You’ll Need:
1. A manicure kit (prepare nails carefully)
2. A base coat
3. Your chosen nail polish colors (cremes work best as a base)
4. A glitter polish or loose glitter
5. A top coat (a thick, glossy one is best for smoothing)
6. A small makeup sponge (for the gradient technique)
7. Nail polish remover and a small brush for clean-up
Design 1: The Glitter Gradient Manicure
Also known as an “ombre” nail, this style features a soft fade of glitter from the tip of your nail down to the base. It’s elegant and less intimidating than a full glitter nail.
Steps:
1. Prep and Base: Start with clean, shaped nails. Apply your base coat and let it dry completely.
2. Apply Your Base Color: Paint your nails with a solid color. Nude, white, or a light pink are classic choices as they make the glitter pop, but a bold color like navy blue or black can create a dramatic, starry-night effect.
3. The Sponge Technique: Don’t paint the glitter directly onto your nail! Instead, paint a generous stripe of the glitter polish onto the corner of a makeup sponge.
4. Dab, Dab, Dab: Gently press the sponge onto the tip of your nail. Start by concentrating the glitter on the very tip, then use a dabbing motion to work it about halfway down the nail. The goal is a dense glitter concentration at the tip that softly fades towards the middle.
5. Repeat and Seal: You might need a second coat with the sponge for a more intense fade. Once you’re happy with the gradient, let it dry for a few minutes, then seal everything in with a thick top coat. This will smooth out the texture and make your manicure last.
Design 2: The Half-Moon Glitter Nail
This retro-chic style is a modern classic. It involves creating a crescent-moon shape at the base of your nail and filling it with glitter, creating a striking contrast.
Steps:
1. Prep and Base: As always, begin with a base coat on clean nails.
2. Create the Half-Moon: There are two easy ways to do this:
- Using Stickers: The easiest method! Purchase hole reinforcement stickers (the ones for binder paper). After your base coat is dry, place one sticker at the base of your nail, following the curve of your cuticle. This will leave the moon-shaped area exposed.
- The Freehand Method: If you’re confident, you can carefully paint the main color of your nail, intentionally leaving the moon area at the base bare.
3. Fill with Glitter: Using the brush from your glitter polish, carefully fill in the exposed half-moon area. You may need two thin coats for full coverage. If you used a sticker, wait for the glitter to become tacky-dry (not fully wet) before you slowly peel the sticker off. This will give you a super clean line.
4. Paint the Rest: If you used the sticker method, you can now paint the rest of your nail with your main color polish. If you went freehand, you’ve already done this step!
5. The Final Seal: Once everything is completely dry, lock in the design with a strong top coat.
A Final Tip: The key to a great glitter manicure is a good top coat. Glitter can be thirsty, so you might need two layers of top coat to get a perfectly smooth, glassy finish.
So, go ahead—embrace the sparkle. Whether it’s a subtle gradient or a bold half-moon, glitter nails are a simple and fun way to express your personal style. What’s your favorite way to wear glitter? Let us know in the comments.
Read also: Professional Foot Care Guide